Catalyst is a Next.js-based starter kit for headless projects on BigCommerce. In this article, we’re going to show how simple it is to get set up and deploy to Vercel.
At one level, Catalyst is far from the first project of its kind. You might be familiar with Alokai (previously Vue Storefront), Deity or even Next.js Commerce. The challenge for any platform-agnostic headless frontend is abstracting what is common to all platforms, leaving them optimised for none.
What’s different with Catalyst as a first-party product from BigCommerce, is that it can be optimised for their platform – meaning wider platform feature support.
If you’ve worked with Stencil themes, you’ll be familiar with the official Cornerstone theme. While this theme appears plain, it’s the best starting point for new themes with support for almost all platform functionality and has had significant investment to ensure performance and accessibility requirements are met.
Turning to the headless context, Catalyst is the Cornerstone of the Next.js world. Typically BigCommerce positions itself as open and adopts a “bring your own partners” mentality. However, there comes a time when backing a horse is for the customer’s benefit. And so Catalyst is an opinionated view of headless, where going headless doesn’t mean starting from scratch and having to make every decision for yourself.
In this article, we’re going to look at setting up a new Catalyst project and then how to deploy to Vercel – the preferred cloud hosting partner.
Create a new Catalyst project
Getting a Catalyst project created couldn’t be easier.
Start off by running:
npm create @bigcommerce/catalyst@latestYou’ll then be prompted for a project name, and can then connect to a store. This will automatically generate some API credentials and store them in .env.local for you.
Lastly, you can choose which channel to connect to. BigCommerce recommends you create a new channel so that you’re not using the Stencil storefront channel.
The installer will then fetch dependencies and generate GraphQL schema & lint generated types.
After a few minutes, you can then change into your project directory and run
npm run devAnd then open http://localhost:3000/ and you’re away!
As you browse around the codebase for the first time, there will be a few implementation details to note:
- Uses App router & react server components
- Includes a developer-friendly GraphQL client with typescript support for responses.
- Radix UI as an accessible UI library.
- Implement styles quickly using Tailwind.
- Defaults to running on the edge to minimise latency.
- Generates and serve static pages wherever possible to maximise performance.
- The with-routes middleware determines what should be rendered for each URL, e.g. is it a product page, category page, etc.
It’s early days but it’s already gathering a head of steam and receiving positive feedback from the developer community.
Deploy to Vercel
Vercel is a frontend cloud hosting solution known and is also the creator of Next.js. The platform is widely regarded as having the best developer experience. Naturally, BigCommerce have partnered with Vercel to ensure that Catalyst makes the best use of the platform and can be pointed to as best-in-class Next.js e-commerce.
The path to publishing your Catalyst project to Vercel is smooth.
First, ensure that you’ve committed and pushed your project to a new GitHub repo.
Then, head over to Vercel to log in or create an account. Choose to create a new project and import your new repo. The only configuration that you’ll want to do before hitting deploy is to set up the environment variables that will connect to your BigCommerce store. You can do this quickly by copying and pasting the contents of .env.local into the environment variable form. You may wish to change the ENABLE_ADMIN_ROUTE variable to false.
After just a couple of minutes, your project will be live on a Vercel-generated URL. At this point, you can choose to add a custom domain. If you’re using Cloudflare, it’s recommended to disable the proxy and use it just as DNS provider. Otherwise, this can end up drastically reducing performance.
There’s one more step that’s required which is to create a KV database. This can be done with a couple of clicks. This is important so that Catalyst can cache the mapping between URL and page type which otherwise would slow down responses.
While you’re at it, you can also enable Vercel Analytics and Speed Insights to understand how real users experience your site.
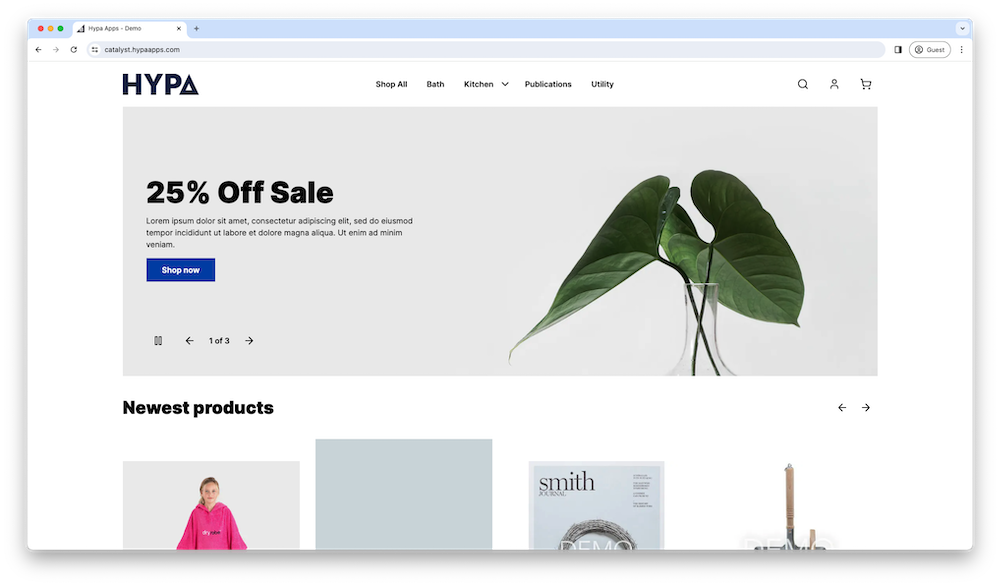
Our demo store at catalyst.hypaapps.com shows impressive response times, with static page response times of ~200ms and uncached pages of around 800ms. And because it’s a single-page application, subsequent page loads are even faster, giving users a smoother experience compared to Stencil storefronts.
